A Detailed Explanation of E-Sewa Portal
A one-stop solution to access EPF requests without having to visit the EPFO office, is the E- Seva Portal. The E- Seva Portal provides facilities to employees in order to claim their PF, check the status of the processed claim and update the KYC details. Moreover, the employer also gets to update the information of employees or the organisation in order to make their EPF contributions.
A special resource was initiated by the EPFO in order to achieve an online receipt of the ECR(Electronic Challan cum Return). It is necessary for the employers to register their companies on the portal either by setting up an USER ID that is unique in nature as well as a password that is protected in order to get benefits under this facility.
Once the registration has been finished, the Electronic Return can be uploaded by the employees. The information of the return that was uploaded will be present on the digitally signed copy or it could be saved as a PDF and can be printed afterward. After its validation by the employer online, a challan based on the uploaded return will appear on the screen. The employer can choose to pay through net banking. He can also pay at any of the listed branch banks by printing a copy of the challan.
The various advantages of the E- Seva Portal are listed below:
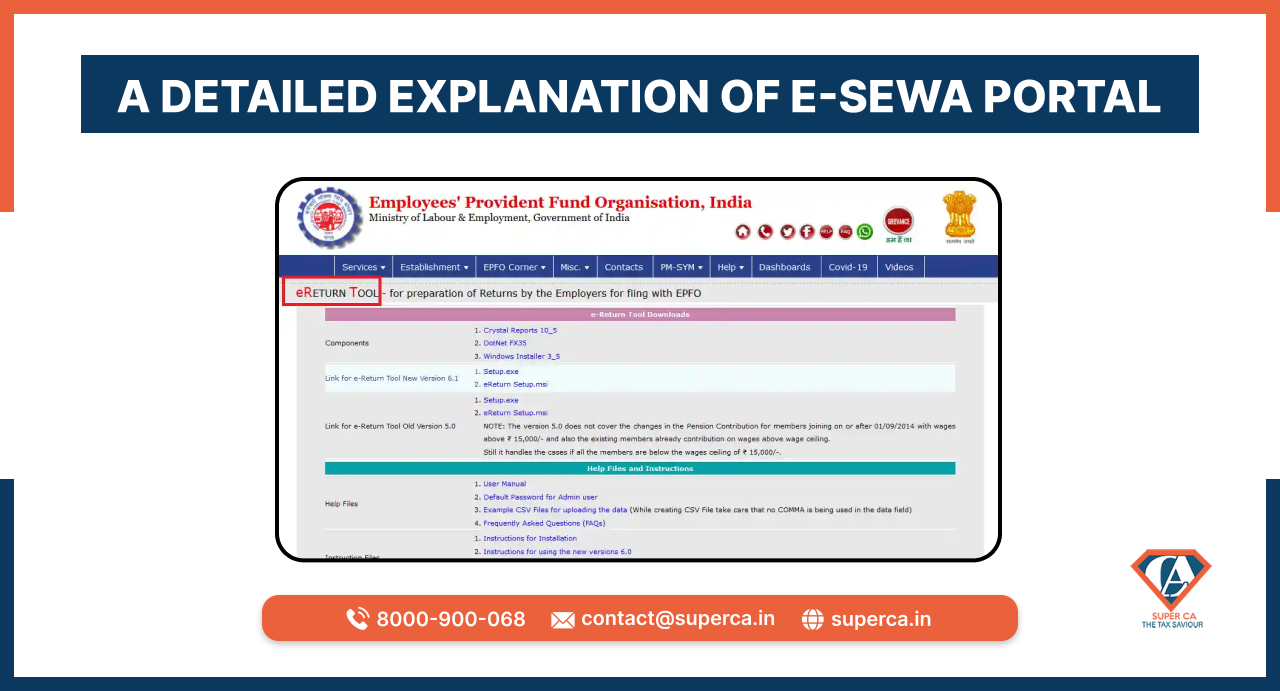
To download the E- Return Tool, the user will have to visit the official EPFO website. On the website, select the E-Return Tool for employers. The employer can now install the software and provide all the details of the employees like wages and their contribution to EPF.
Use ‘Generate Returns for Submission to EPFO’ and ‘ECR’ to generate their text files.
An online receipt that is instituted by the EPFO is known as an Electronic Challan Cum Return or an ECR. An ECR is an electronic return which is in the format of plain text that involves lines in order to mention the details. The registration of the company and the generation of USER ID and Password can be done by the employers through the EPFO portal. Registered get to upload their Electronic Returns and the data that has been uploaded will be shown in PDF format through a digitally signed copy.
All the dues must be remitted by the employer online as each ECR is related to a remitted challan. Those ECRs that have been uploaded but have not been remitted will be declined after 12 days of their creation. The ECR uploading on a monthly basis will mitigate the employers from filing paper returns either monthly or annually.
The ECR was launched by the EPF department in order to reduce the amount of time it takes to apply for a claim or an addition of an employee by traditional ways. The prerequisites to pull up the e-challan are listed below:
Step 1: Visit the E-sewa Portal
Visit the E-sewa portal and log in to your account.
Step 2: Uploading the generated ECR
Select ‘ECR upload’ and upload the generated ECR under ECR. The ECR should be uploaded for the correct month and year. Then, a summary page will appear on the screen, click on confirm if the file has been uploaded adequately.
Step 3: Entry of EDLI contribution
On the summary sheet, the applicant can also input the details of ‘Total EDLI contribution’, ‘Total EPF Inspection Charges’ and ‘Total EDLI Inspection Charges’. In addition to this, the applicant can also update the ‘contribution rate’ adequately.
Step 4: ECR submission
Submit the ECR.
Step 5: Documents that have been digitally signed
A digitally signed PDF will be displayed on the screen. In case the file has more than 200 members, then the user will have to wait for an SMS alert in order to view or download this file. Moreover, the information on the pdf needs to be validated to make sure that it has the same information as uploaded on the ECR text file.
Step 6: Getting the PDF file approved
Once the accuracy of the text file has been checked, the user will have to approve the PDF file in order to generate a challan online. For this, select ‘Approve’.
Step 7: TRRN
Once the user has approved the ECR file, A TRRN a.k.a a Temporary Return Reference Number will be pulled from the uploaded ECR text file. Then, the challan receipt file and the acknowledgement slip will appear on the screen.
Step 8: Downloading the receipt file of challan
Click on print challan with TRRN number and update the details under ‘or establishment use only’ and make the payment in addition to the challan to the respective bank either by cheque or demand draft or via online portal.
Step 9: Confirmation
For the confirmation on the deposit of the cheque, the user will receive an SMS alert for the deposit.
In this blog, we came across the E- Seva Portal and its advantages for the employers. We also learnt about the process to set up an account at the E- Seva Portal and the steps to download E -Return Tools. We also discussed the ECR (Electronic Challan CUm Return), the steps to file an ECR. the prerequisites and the generation of an ECR.

|
12 Unique Business Ideas For 2025 | A Complete List Author: Rahul Singh 20 Jan, 2025 |

|
Essential LLP Registration Documents: A Complete Checklist for Entrepreneurs Author: Rahul Singh 04 Apr, 2024 |

|
Sole Proprietorship Registration in Delhi Author: Rahul Singh 29 Mar, 2024 |

|
How sole proprietorships are taxed? Author: Rahul Singh 23 Mar, 2024 |

|
Does a Partnership Need to Be Registered? Author: Rahul Singh 16 Mar, 2024 |

Get inspired by these stories.
Get inspired by these stories.